Since I was kind of putting myself in the position of the Everyman with marginal artistic skill, I limited myself to these art supplies.
My daugther's drawer of felt tip pens.
Being half Swedish myself, I based my Officer’s uniform on those of Sweden’s army during the Napoleonic wars. This meant a predominately blue and yellow uniform.
In the past, I had used Sharpie pens to color other homemade wooden soldiers, but ran into a noticeable problem with the ink bleeding along the wood grain. So I wanted to make try a few tests first. Here are a number of different pen color tests that I made on the sprue frame & the underside of the Officer’s base. I found that either because of the much tighter grain of the wood that the Officer was made out of, or because of differences in the non-Sharpie ink, I had no problem with the ink bleeding.
I found I needed to use a very golden color for the yellow, otherwise it wouldn’t look much different from the color of the wood. Here is the selection of pens I settled on. The one "cheat" I made was to use a metallic silver Sharpie which was not part of my daughter's pen collection.
After deciding on the pens, I wanted to color a test piece. I picked the Shako for my Officer to wear, so was left with the Bicorn to use as a test. I quickly learned to color in the direction of the lines of the etched wood. The edges and corners of the etching are very rigid, so they can quickly tear up the soft felt tips of the pens. Here is my first try at coloring inside the lines.
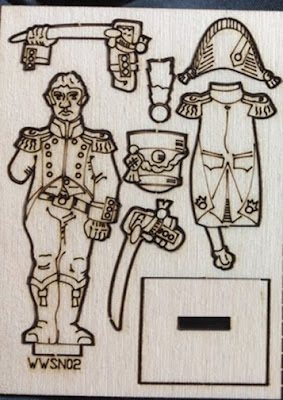
Being very pleased with how it came out, I went to town on the rest of the Officer. Here are the unassembled pieces before I started (I initially forgot to take a "before" picture). I realized I should color all the pieces first before gluing them together. If I didn’t, then it would be tough to get the fat-tipped pens into the creases where the 2 layers of wood joined together.
And here are the final colored pieces. As you can tell, I got a bit sloppy on the back of the coat. I picked a mostly dried out black pen to do the Shako & boots in order for it to be slightly grey so the etching could still be seen.
And here is the officer finally assembled. I intentionally glued the plume on backwards since the plumes on Sweden’s hats were solid white. The front of the plume has an etched line half way up it to allow for 2 colored plumes (you can see the dividing line on the photo of the back). I also put the plume off to the side of the Shako since they were usually on the side of the hats instead of in the front.


Overall, it took me about 20 minutes to color, not including the test pieces. That did include checking the Swedish uniform references & Tom’s blog a number of times for examples. And I was taking extra time when coloring the small details since I was using such fat-tipped pens.
So, even with a bunch of felt tipped pens, these soldiers can be colored quite nicely. And that’s the beauty of Tom’s idea, his artwork combined with the laser etching means you start with a very nice looking figure before you’ve done anything. And your coloring (or painting) of the solider not only makes it better, but it’s a lot of fun too. And best of all, if you pick the scented felt tip pens, your solidiers can even smell good too.


